Once you’ve unboxed your monitor, the next step is getting it synced with the Petivity App. The process is designed to be quick and easy. The app will guide you through the process of syncing your monitor (or monitors) step by step so Petivity can start gathering data about your cat’s litter box behavior and weight! Here’s how to get started:
Step 1. Download the Petivity App from the Apple App Store or Google Play Store.

Step 2. Open the Petivity app and start the syncing process by selecting “Add Monitor”.
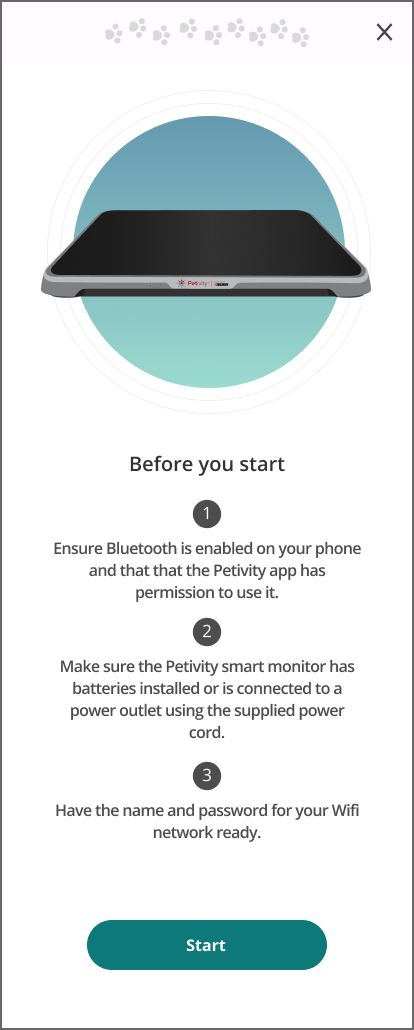
Step 3. Follow the “Before you start” guidelines.
- Ensure Bluetooth is enabled on your phone.
- Make sure the Petivity smart monitor has batteries installed or is connected to a power outlet using the supplied power cord.
- Have the name and password for your Wi-Fi network ready to ensure you are able to complete the syncing process before the device times out.

Step 4. Wake your monitor.
When you power your monitor by inserting batteries or plugging it in via the power cord, the monitor will automatically turn on and the LED light next to the status button will flash blue. If the blue light is already flashing when you reach the “Wake your monitor” step of the sync process within the app, you are ready to move on! Tap Continue to move on to the next step of the process.
If the blue light is not flashing or has stopped flashing by the time you get to the “Wake your monitor” step of the syncing process, briefly tap and release the status button to get the blue light flashing again before tapping “Continue.”

Step 5. Select your monitor.
The app will search for nearby Petivity smart monitors that are powered on and provide a list of monitor serial numbers to select from. (You can locate your monitor’s serial number on the label on the underside of the monitor.) Choose the one you wish to sync with the app.

Step 6. Select your Wi-Fi network
The app will generate a list of nearby Wi-Fi networks. Select the one you wish to connect to and enter the Wi-Fi password when prompted.

Step 7. Name your monitor
Naming your monitor can be a helpful way to distinguish between different monitors if you have more than one. We recommend using a location or other distinguishing feature to help you quickly tell which monitor is which.

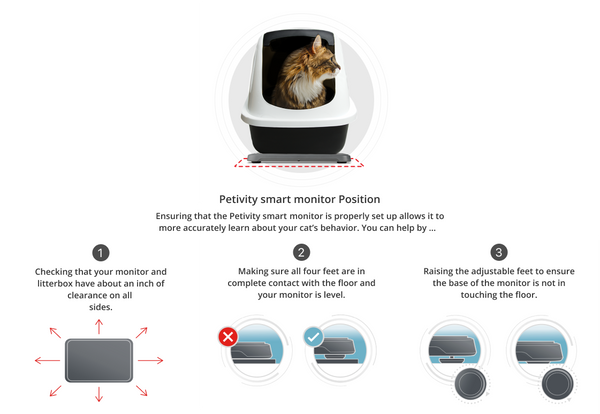
Step 8. Check the positioning of your monitor
The app will provide a list of helpful tips to ensure that your monitor is able to provide the best possible data. Place the monitor on a hard, flat surface to ensure optimal data collection. After making sure your monitor is positioned correctly, move on to the last stage of set-up by tapping Continue.

Step 9. Complete set-up & allow firmware to update if available
When you reach the “Set-up complete” screen within the app, you may see a green light flashing. This indicates that there is a firmware update available that is being automatically installed on the monitor. There is no need to tap the status button or take any other action. You can complete the set-up process within the app by tapping “Save” or “Add another monitor” and the system will complete any necessary firmware updates automatically.

